# Flipper Zero
In this section I will gather relevant information and techniques for Hardware Hacking with the Flipper Zero, one of the most popular hacking tools today.
{% hint style="danger" %}
[**Disclaimer:** The techniques described in this manual should be performed in a controlled environment and ethically. I am not responsible for the misuse of these techniques.](#user-content-fn-1)[^1]
{% endhint %}
## Introduction
In this section we will see an introduction to the Flipper Zero and how to configure it correctly.
### Official documentation
Flipper Zero is constantly being updated, so it is recommended to check the official documentation:
{% embed url="" %}
### On
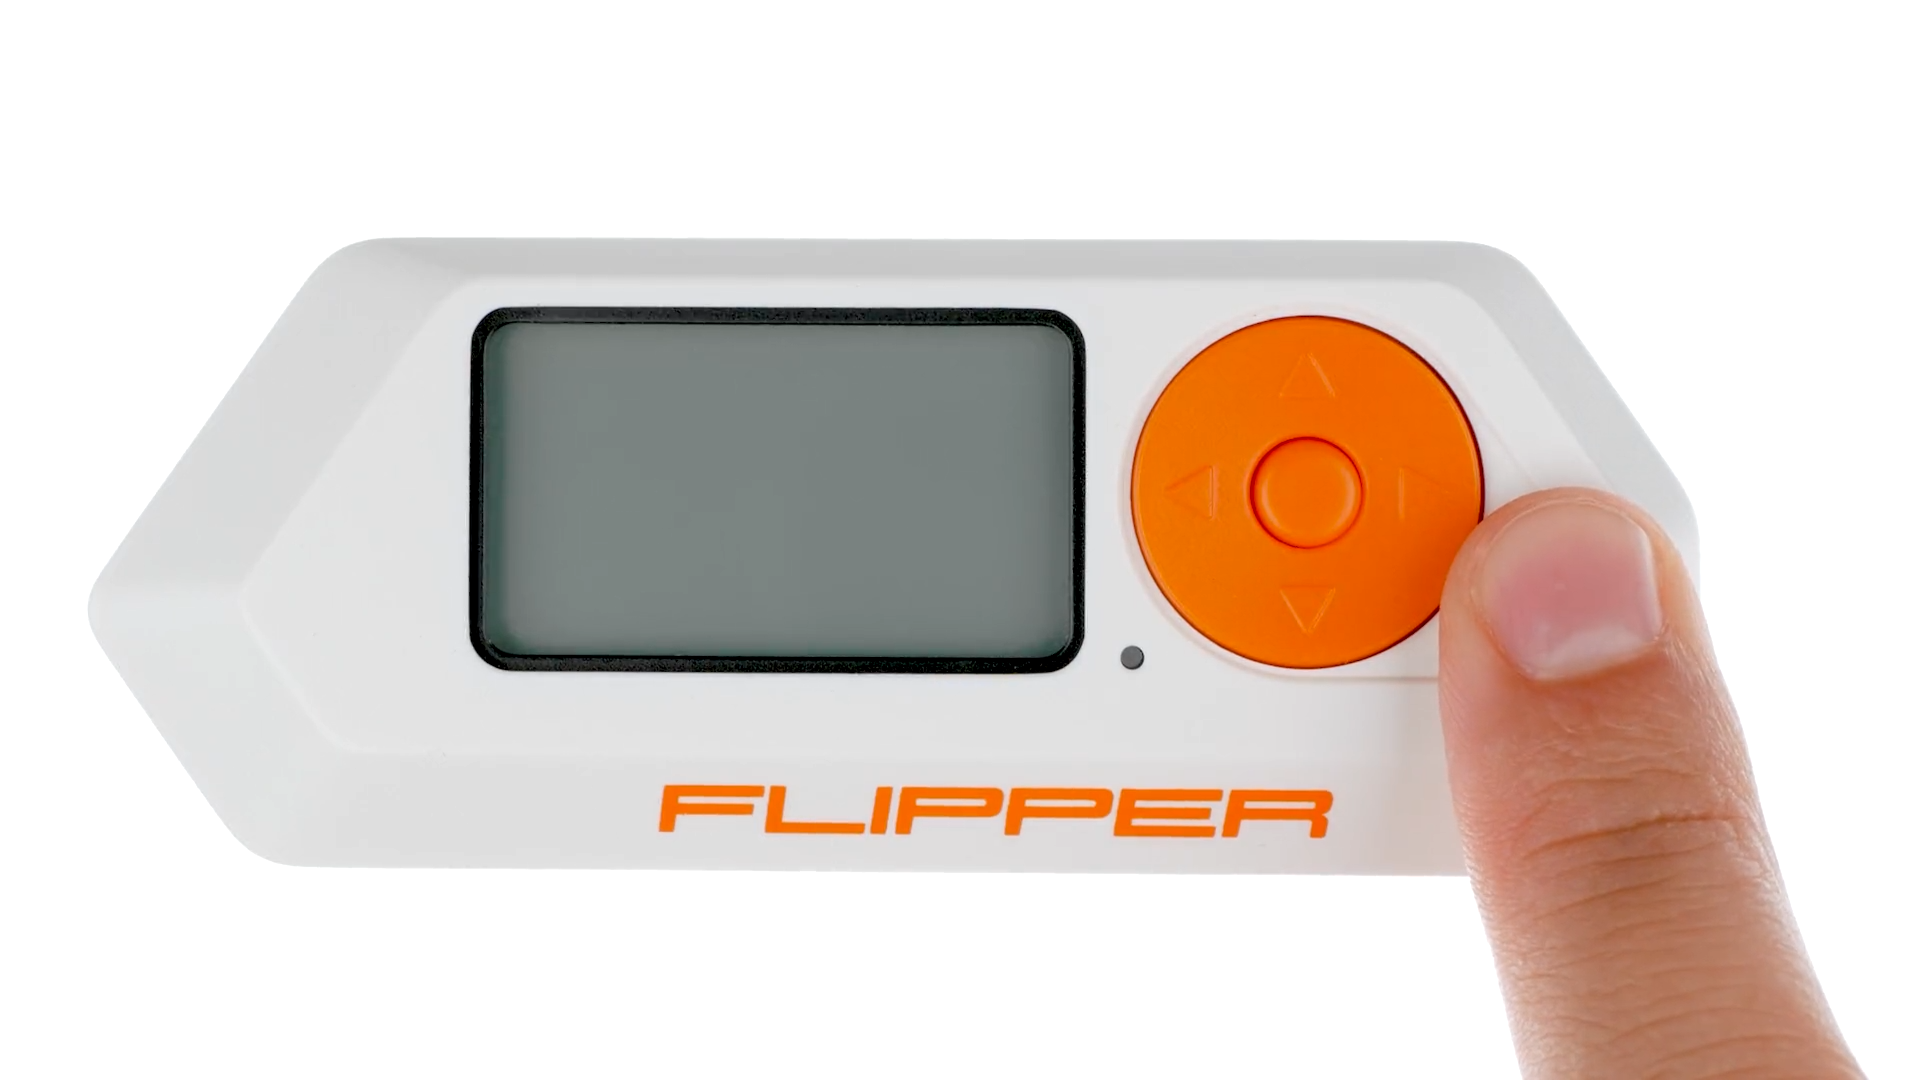
Turn on the Flipper Zero by pressing and holding the **BACK** button for 3 seconds.
If your Flipper Zero won't turn on, its battery may be completely drained. To turn it on, simply connect the USB charging cable, and the device will power up automatically. If your Flipper Zero still won't turn on even after charging, try pressing and holding the LEFT and BACK buttons for 5 seconds. If your Flipper Zero still won't turn on, follow the steps outlined in Firmware Recovery .
### Restart
If your Flipper Zero freezes while in use, press and hold the **LEFT** and **BACK** buttons for 5 seconds to reset the device.

If your Flipper Zero freezes, restart it. The Flipper Zero can be restarted in several modes, including recovery mode. For more information about the restart types, visit [Restart](https://docs.flipperzero.one/basics/reboot) .
### Insert a microSD card
{% hint style="warning" %}
A microSD card is required to use the device. Flipper Zero does not come with a microSD card, so you will need to purchase one separately.
{% endhint %}
The microSD card stores various types of data, such as keys, cards, remote controls, databases, and more. The Flipper Zero supports microSD cards up to 256 GB, but a **4 GB microSD card is sufficient** for storing all your necessary data. Keep in mind that the Flipper Zero may take longer to recognize a microSD card with a larger storage capacity.
For more information, visit the [MicroSD card settings](https://docs.flipper.net/basics/sd-card) page .
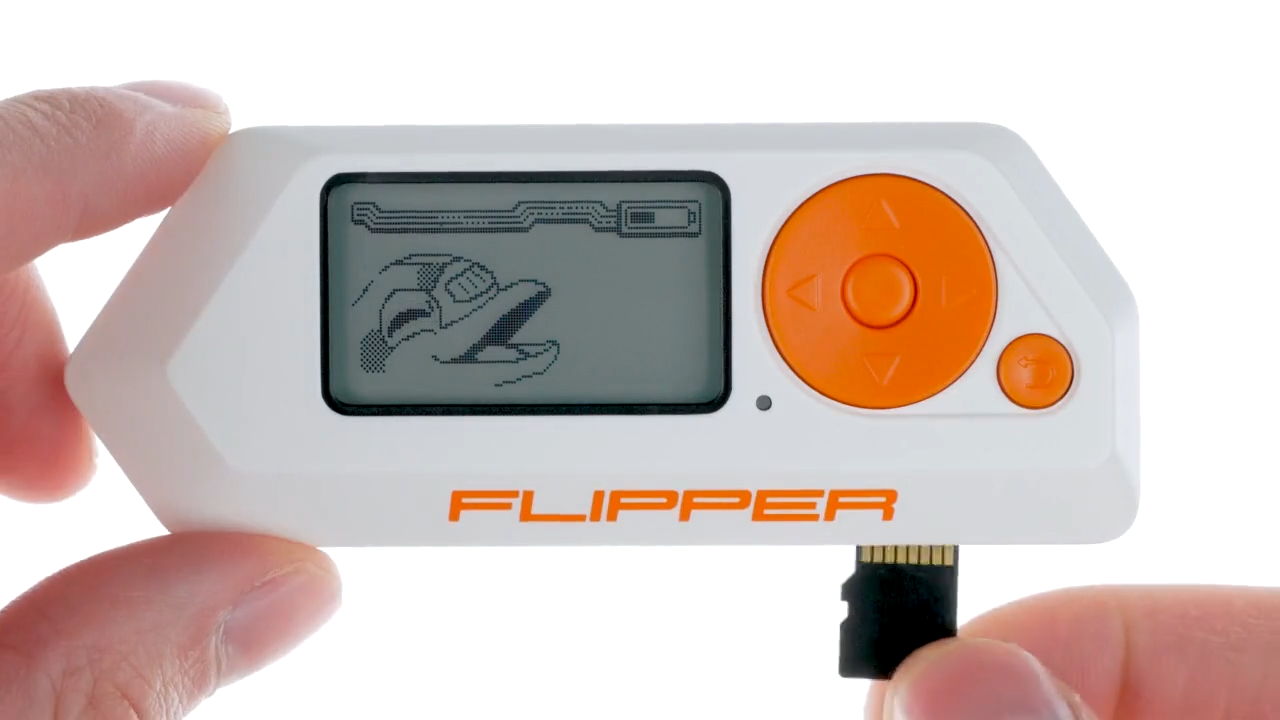
Insert the microSD card with the pins facing upwards. Use a high-quality microSD card.
It is important to use high-quality, brand-name microSD cards, such as SanDisk, Kingston, or others, to ensure proper performance of your Flipper Zero. Using low-quality microSD cards can not only result in poor performance but may also brick or even damage your device.
If your Flipper Zero does not recognize the card, visit [the relevant section of the MicroSD card settings page](https://docs.flipper.net/basics/sd-card#rtpsy) .
### Update the firmware
Insert a microSD card before updating your Flipper Zero. Make sure you have a microSD card in your Flipper Zero before updating the firmware: the device needs it to store its databases. For more information, see [MicroSD Card Setup.](https://docs.flipperzero.one/basics/sd-card)
The Flipper Zero firmware is under active development and changes frequently. We recommend updating your Flipper Zero firmware to the latest version immediately.
You can update your Flipper Zero via the Flipper or [qFlipper ](https://docs.flipperzero.one/qflipper)[mobile app](https://docs.flipperzero.one/mobile-app) :
With **the Flipper mobile app** , you can update your Flipper Zero directly from your phone via Bluetooth. The Flipper mobile app is available for iOS and Android.
### Connect the phone to Flipper Zero
Once you have downloaded the Flipper mobile app, you can connect your phone to your Flipper Zero:
1. Turn on Bluetooth on your phone.
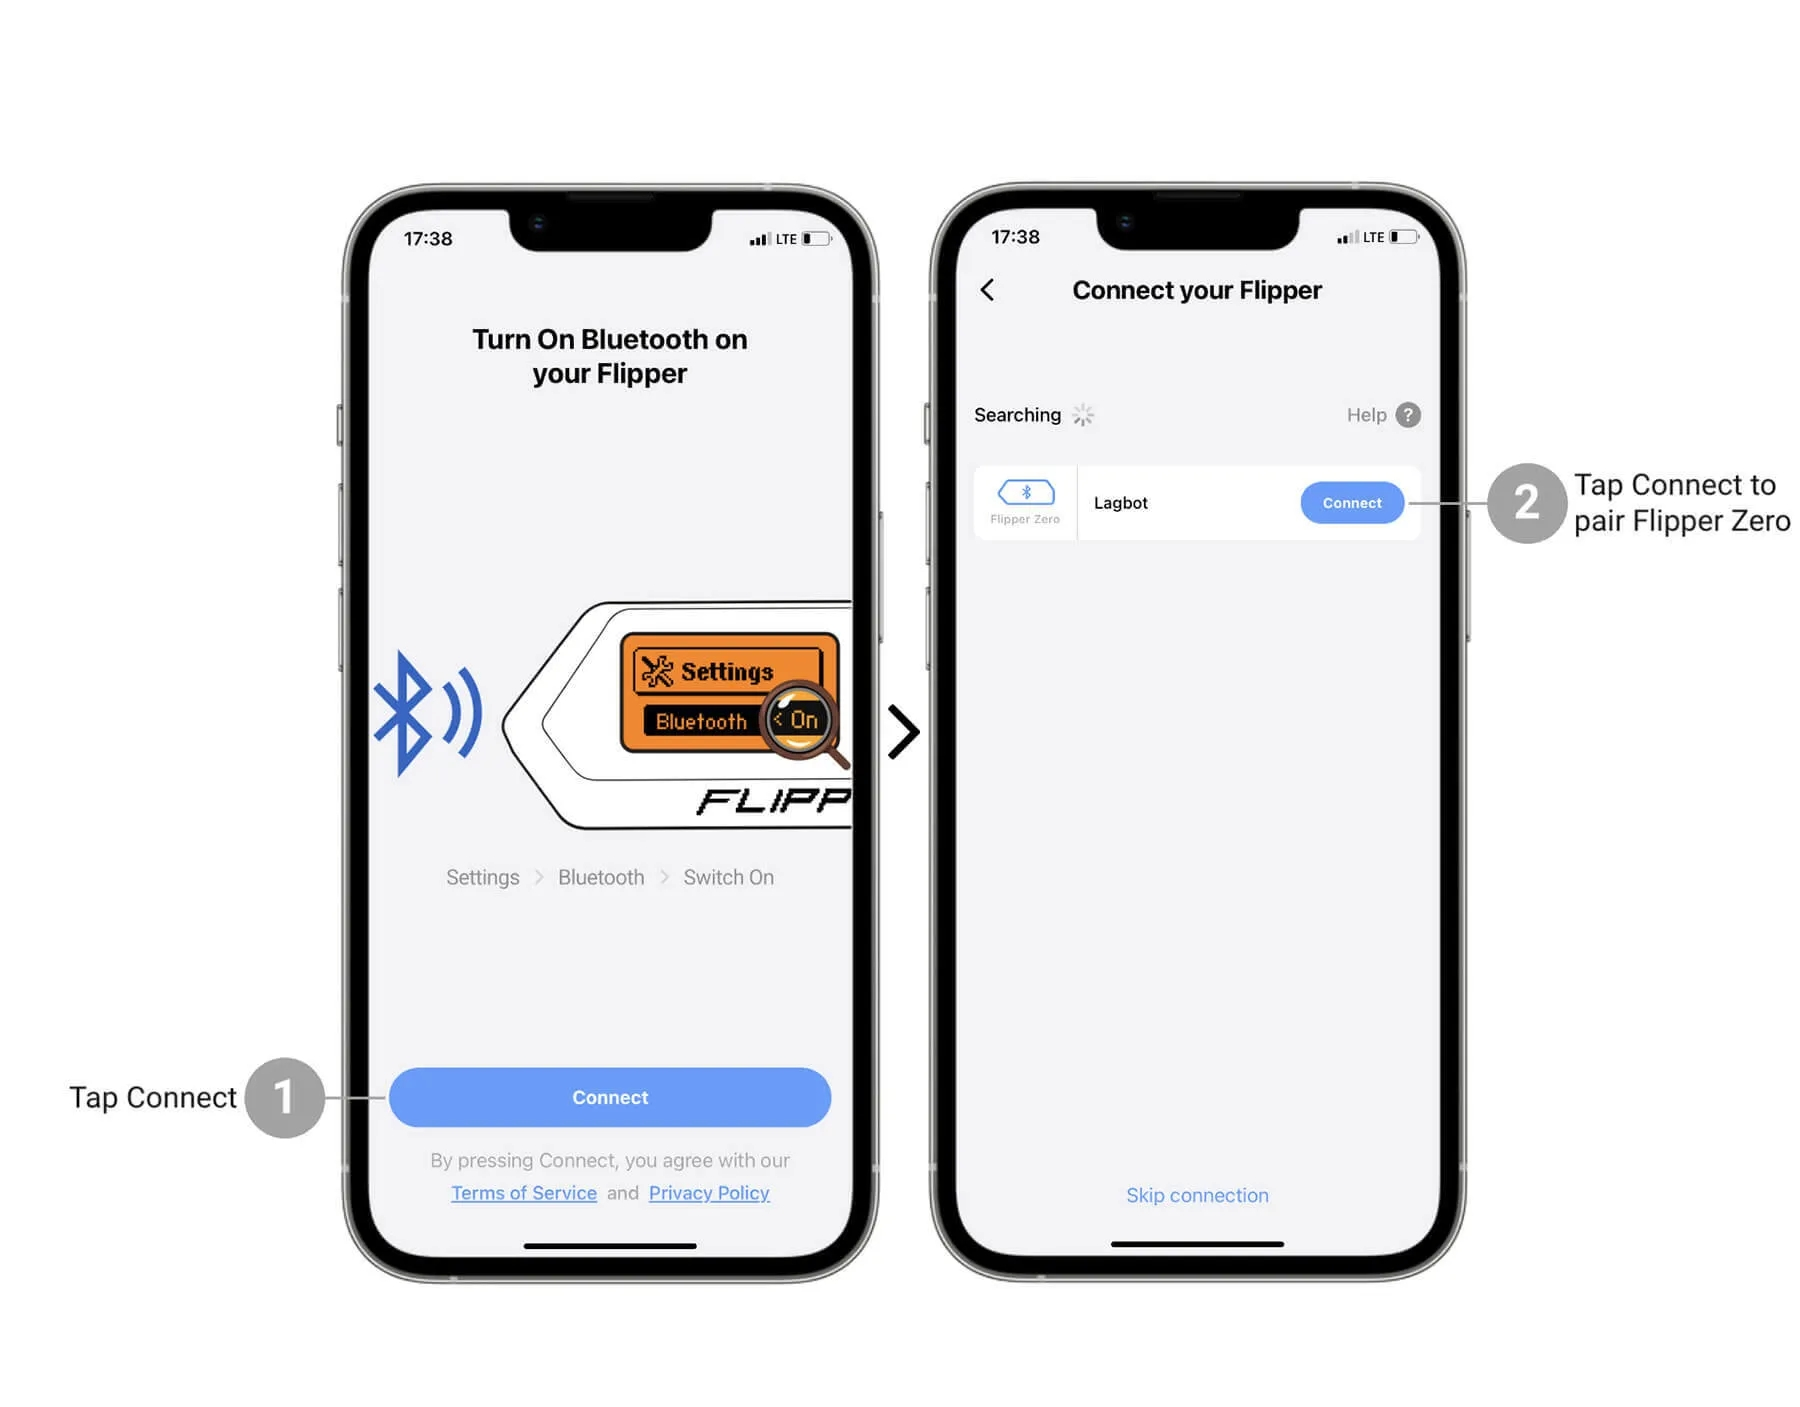
2. Activate Bluetooth on your Flipper Zero:
* Go to **Main Menu -> Settings -> Bluetooth**
* Set **Bluetooth** to **ON**
1. In the Flipper mobile app, tap **Connect** .
2. On the next screen, next to the name of the detected Flipper Zero, tap **Connect** .
In the Flipper mobile app, **enter the pairing code** shown on the Flipper Zero screen.
1. Tap **Pair** to complete the pairing.
### Update Flipper Zero through the Flipper app
To update your Flipper Zero via the Flipper mobile app, do the following:
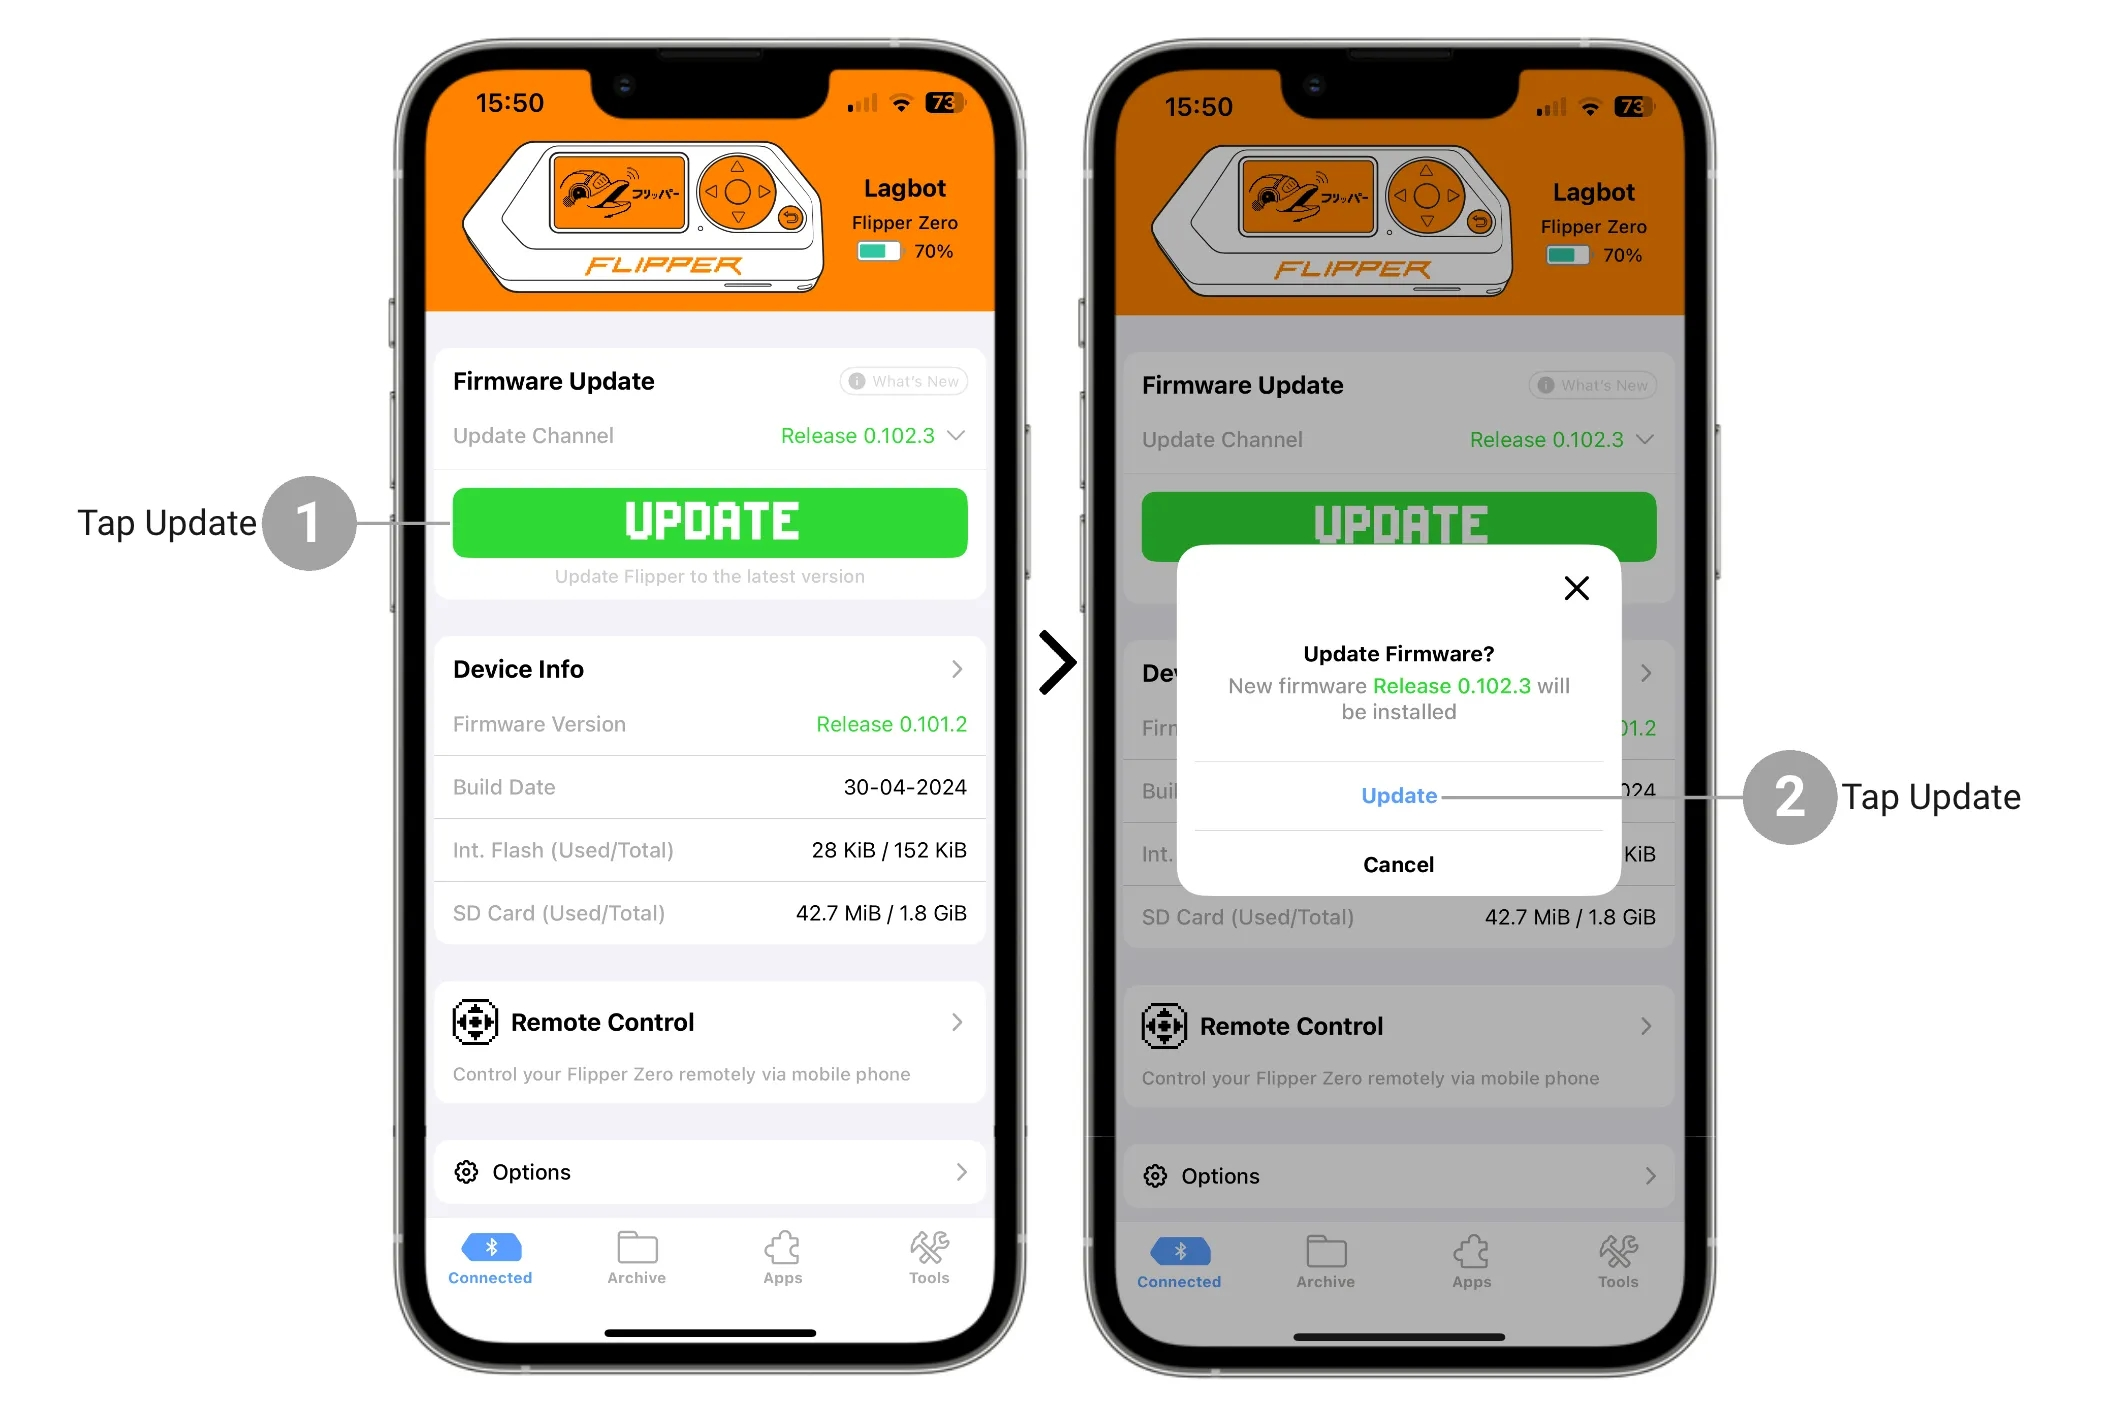
1. On the Main Menu tab, tap the **Update button.**
2. Tap the **Update** button to confirm the action.
The update via the Flipper mobile app may take **up to approximately 10 minutes** .
For additional information about the firmware update steps, visit [Firmware Update](https://docs.flipperzero.one/basics/firmware-update) .
### Customize system preferences
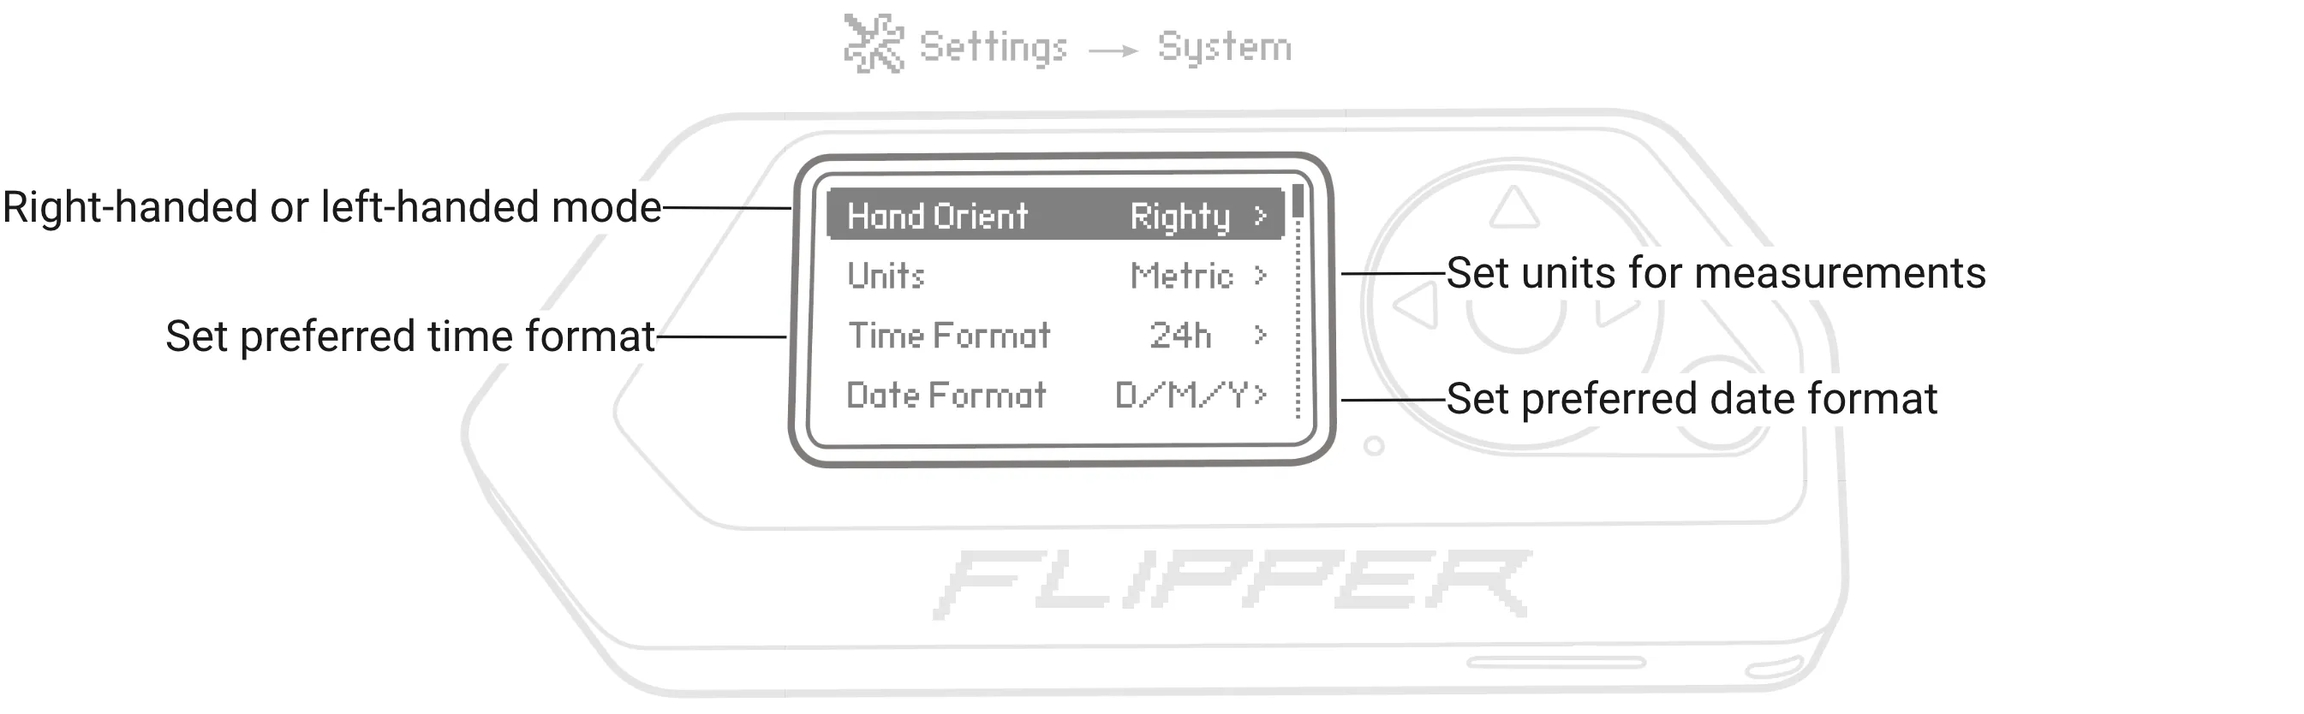
Once you have updated your Flipper Zero, you can modify the system settings, such as switching to left-handed mode, configuring your preferred units of measurement, and selecting the date and time format. To access the system settings, go to **Main Menu -> Settings -> System** .
For more information, visit the [Settings](https://docs.flipper.net/basics/settings) page .
### Battery charging
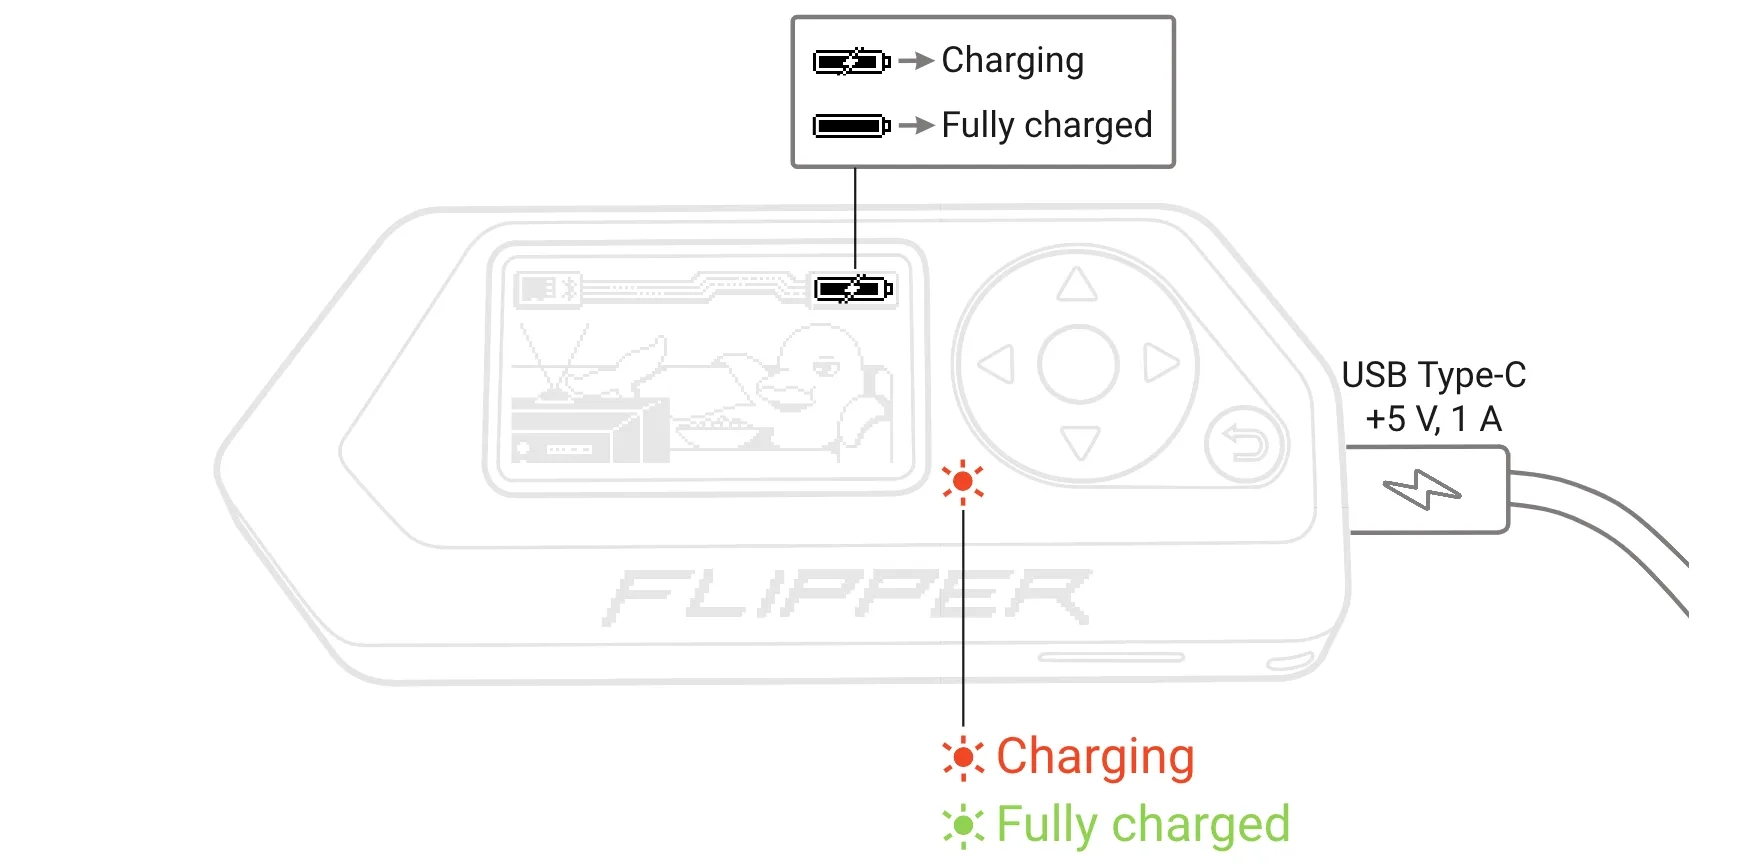
To charge the Flipper Zero, connect the included USB Type-C cable to the charging port and a power source. A full charge of the device takes approximately two hours.
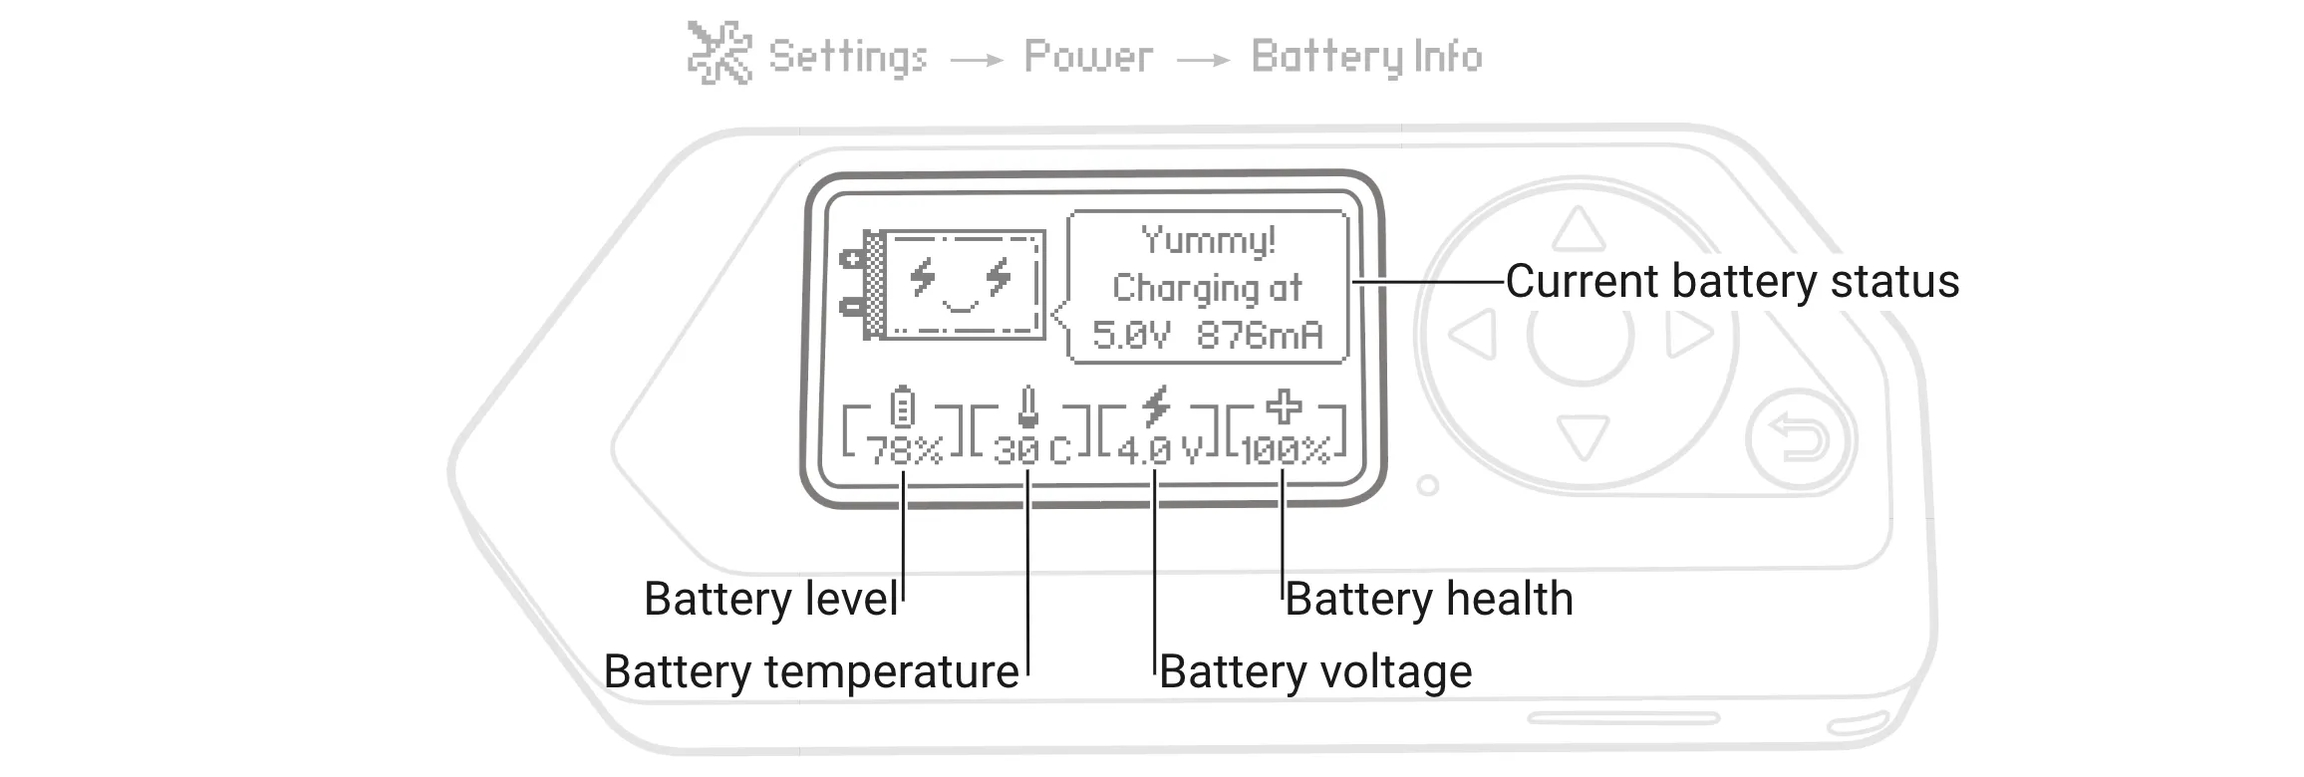
To view battery information, go to **Main Menu -> Settings -> Power -> Battery Info**
### Turn off the Flipper
To turn off your Flipper Zero, go to **Main Menu -> Settings -> Power -> Power off** and confirm the action by pressing the **RIGHT** button .
Do not leave the device discharged for long periods. Avoid leaving your Flipper Zero discharged for extended periods. If you plan to leave the Flipper Zero off for an extended period, we recommend charging the device to approximately 50% before turning it off.
Leaving the device discharged for an extended period can degrade battery health.
### Power modes
Flipper Zero has two operating modes: **Active** and **Suspended** . Each mode consumes energy differently.
#### Active mode
When Flipper Zero runs an application or establishes a connection, the device enters Active mode, which consumes up to 30 mA with the backlight on. With an active transceiver, power consumption can reach 400 mA, and even 2 A with an active transceiver and an external module connected.
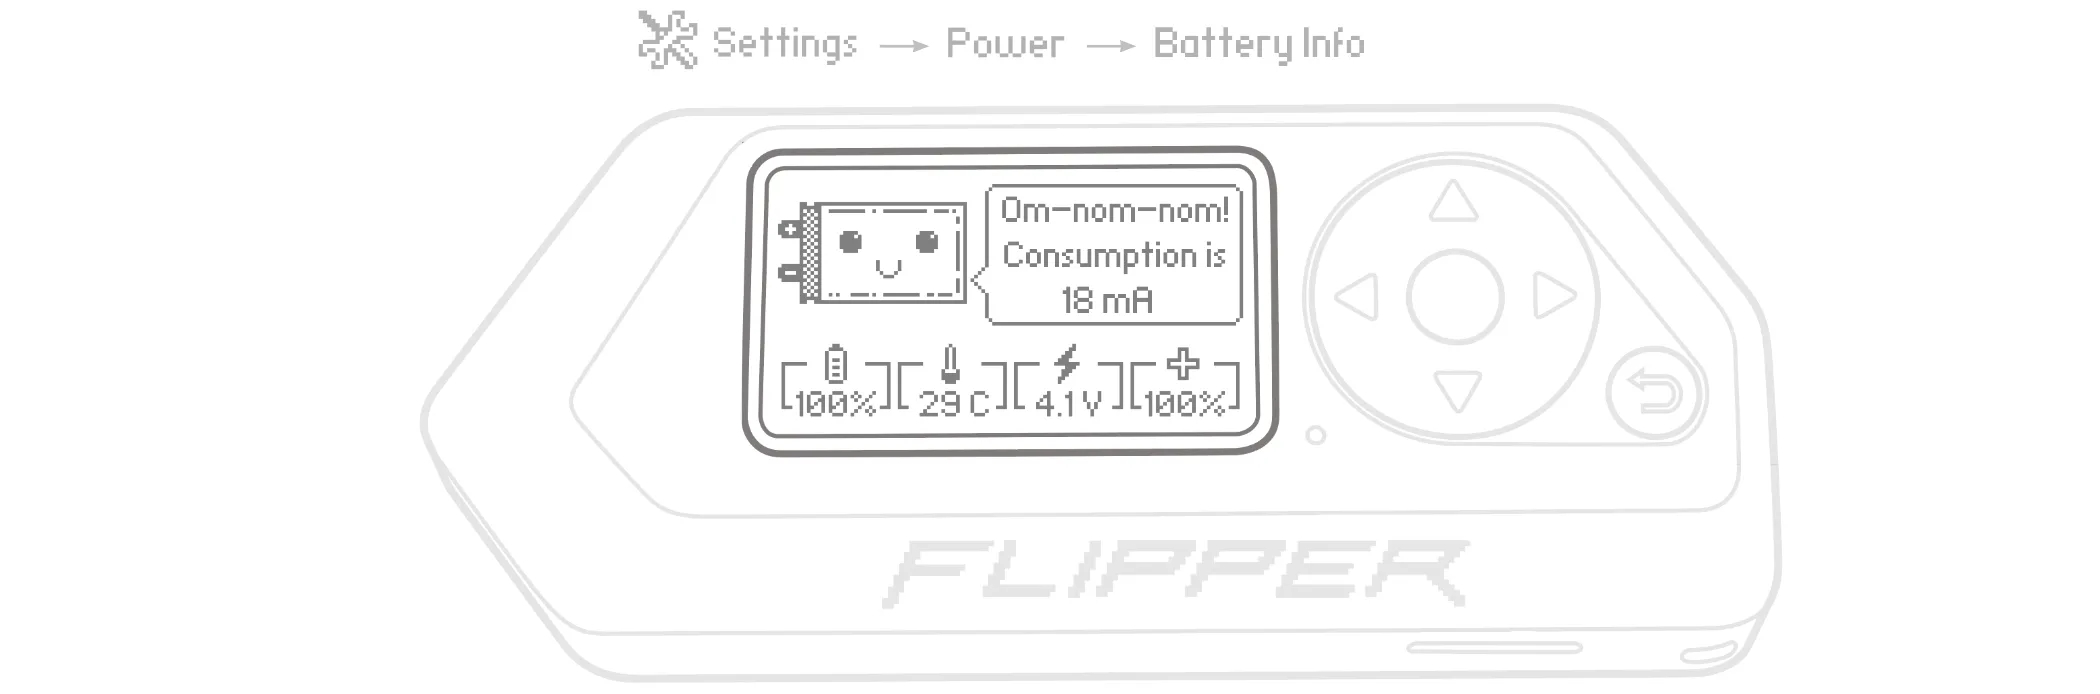
View real-time power consumption. Use a high-quality microSD card for longer battery life. When the screen backlight is on, the Flipper Zero's current consumption with a genuine brand microSD card is up to 30 mA. With a non-genuine microSD card, the total current consumption can reach up to 50 mA, reducing your device's battery life. If your Flipper Zero's battery is draining quickly, check the current consumption: Main Menu -> Settings -> Power -> Battery Information.
#### Sleep mode
When there are no running applications or established connections on your Flipper Zero, the device enters sleep mode, which has a power consumption of around 1.5 mA.
In sleep mode, the device consumes approximately 1.5 mA. For sleep mode to function correctly, debugging mode must be disabled. You can disable debugging mode by going to Main Menu -> Settings -> System, selecting Debugging, and setting it to OFF.
There are two sleep modes available for the Flipper Zero: **default** and **legacy** . The default sleep mode consumes approximately 1.5 mA of power, resulting in longer battery life. However, you may experience device malfunctions while using this mode. The legacy sleep mode consumes 9 mA of power, resulting in shorter battery life but providing greater stability to your device.
You can switch to legacy sleep mode in **Main Menu -> Settings -> System** and by setting **Sleep Method** to **Legacy** .
### Tips for maximizing battery performance
**Battery life** is the amount of time the Flipper Zero operates before needing to be recharged. **Battery life** is the time the battery lasts until it needs to be replaced.
#### Long-lasting battery
* Update to the latest firmware version. -> [Update your Flipper Zero](https://docs.flipperzero.one/basics/firmware-update) regularly as we are constantly optimizing the firmware and adding new power-saving features.
* Optimize your settings. -> You can adjust parameters in the [Settings](https://docs.flipperzero.one/basics/settings) app , such as Bluetooth, display, and system settings.
#### Long battery life
* Avoid extreme ambient temperatures. -> Flipper Zero is designed to operate within a temperature range of 0° to 40° C (32° to 104° F). Avoid exposing your device to ambient temperatures outside this specified range.
* Store the device half-charged when it will be turned off for extended periods. -> Charge your Flipper Zero to approximately 50% before turning it off for an extended period.
## qFlipper
On this page you will find an overview of the application and learn how to install it on your PC. You will also learn how to update and control your Flipper Zero.
**qFlipper** is a desktop application for updating the firmware and databases of the Flipper Zero, managing files on the microSD card, and repairing corrupted firmware. qFlipper is available for Windows, macOS, and Linux.
### qFlipper Installation
To install the qFlipper application on your computer, do the following:
1. Download the qFlipper installation file for your operating system
{% embed url="" %}
1. Run the downloaded file and follow the instructions for your operating system.
### qFlipper: Overview
After installing the qFlipper application on your computer, **connect your Flipper Zero (with a microSD card inserted) to your computer using a USB cable** .
On the **Device Information** tab , you can view key information about the Flipper Zero hardware and installed firmware, [update the device](https://docs.flipper.net/qflipper#ORL5Q) , and [control it remotely](https://docs.flipper.net/qflipper#Yag86) .
The device information tab provides an overview of the main features.
On the **Advanced Control** tab , you can back up, restore, and reset your Flipper Zero, as well as choose the firmware you want to install on the device. Similar to the Device Information tab, you can control your Flipper Zero and initiate the update procedure. See [Internal Storage Repair](https://docs.flipperzero.one/basics/firmware-update/storage-repair) for more information on backup and restore procedures.
The advanced controls tab gives you access to update, delete, and restore functions.
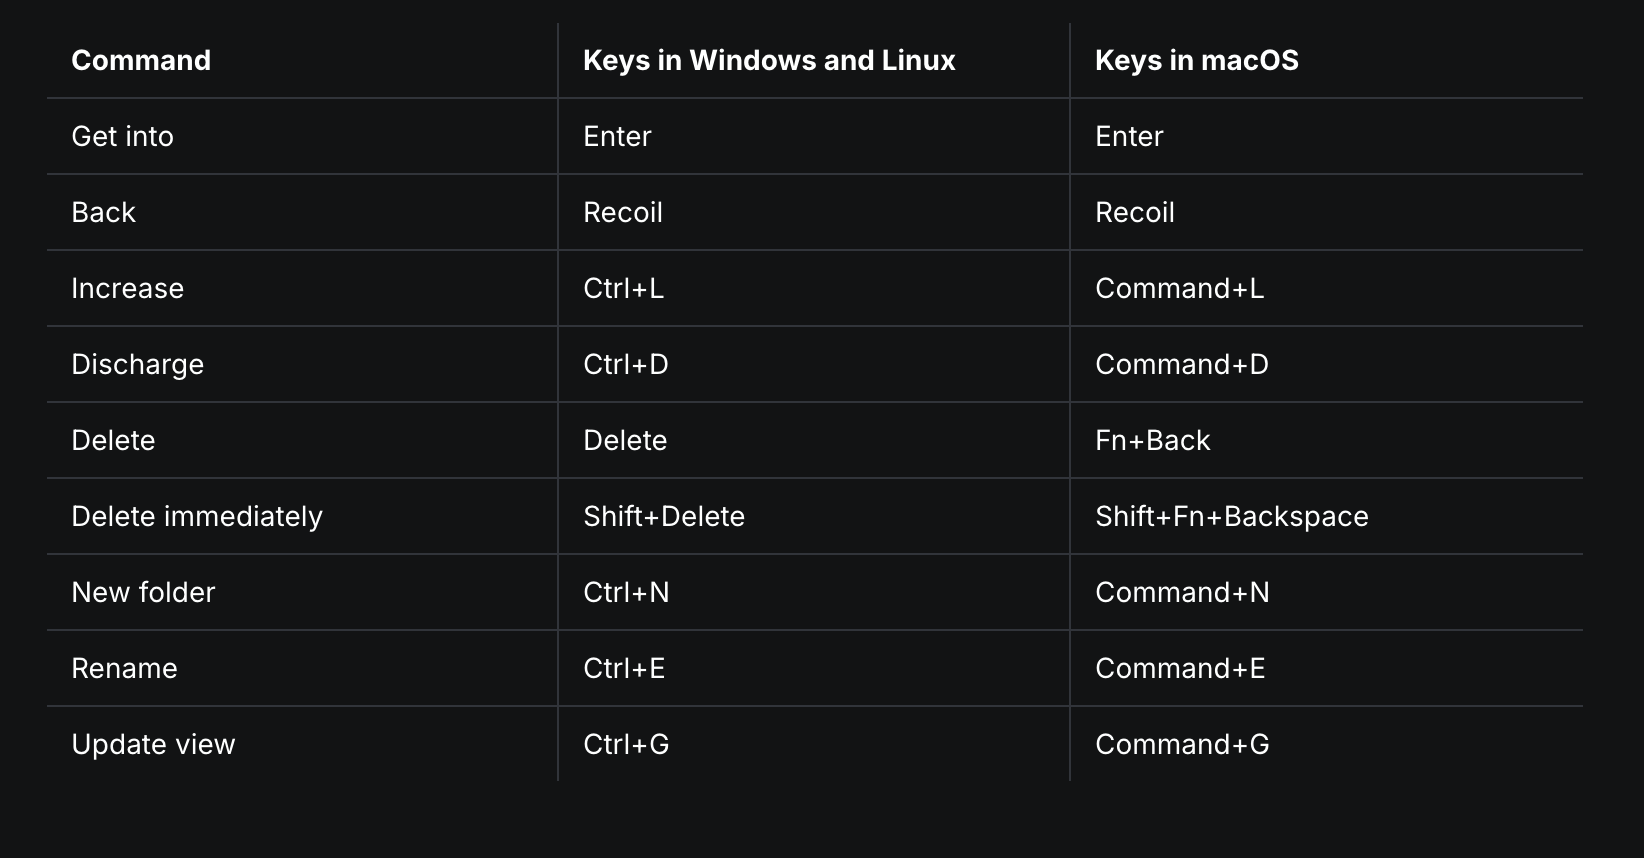
On the **File Manager** tab , you can delete, rename, and upload files to Flipper Zero. You can easily navigate through the files using the arrow keys on your keyboard.
You can manage Flipper Zero files in the qFlipper application.
To upload files in the **File Manager** tab , drag and drop the files into the desired folder or right-click the required folder and click **Upload Here** .
Upon uploading, files with the same name will be overwritten without prior notice.
You can easily navigate the File Manager tab using only a keyboard:
#### **Command**
**Keys in Windows and Linux**
### Update Flipper Zero via qFlipper
The qFlipper app has three firmware update channels:
* **DEVELOPMENT (Dev):** Continuous development involves constantly creating a new version of the firmware with each new commit, often several times a day. This development version includes all the latest features, but it can be unstable, cause crashes or data corruption, or stop working altogether.
* **RELEASE CANDIDATE (RC):** The version submitted for validation testing to the quality assurance department. If errors are detected during the testing phase, the version is revised and a new release candidate is issued. Once the release candidate successfully passes all tests, it becomes the release version.
* **RESEALE:** The stable firmware version has been extensively tested to ensure reliability and is therefore recommended for general use.
Insert a microSD card before the update procedure. To update the firmware correctly, a microSD card must be inserted into the Flipper Zero. The Flipper Zero databases are stored on a microSD card. For more information, see [Configuring the microSD card.](https://docs.flipperzero.one/basics/sd-card)
To update your Flipper Zero via the qFlipper app, do the following:
1. Connect your Flipper Zero to your computer using a USB cable.
2. On your computer, run the **qFlipper** application .
3. In the qFlipper application, go to the **Advanced Controls tab.**
4. Click on **Update Channel** and select a firmware version from the drop-down list ( **Release is recommended** ).
5. Click **Update** to start the update process.
### Controlling Flipper Zero via qFlipper
You can also control your Flipper Zero remotely via the qFlipper app by doing the following:
1. On the Device Information tab, click on the Flipper Zero image.
2. Click the buttons on the screen
3. Use the keypad to control your Flipper Zero remotely. Click on ℹ️ for more information about the keypad controls.
Additionally, you can capture screenshots from your Flipper Zero device and save them directly to your computer by clicking the **SAVE SCREENSHOT** button
## Install qFlipper on Kali Linux
On this page you will learn how to install qFlipper on Kali Linux systems
### qFlipper Installation
To install **qFlipper** on **Kali Linux** and be able to run it globally from any terminal, follow these steps:
***
#### **1. Download qFlipper**
Let's download qFlipper from its official website:
{% embed url="" %}
We select Download for Linux:
The executable file will be in your Downloads folder:
```shellscript
qFlipper-x86_64-1.3.3.AppImage
```
Install dependencies required to run files `.AppImage`:
```shellscript
sudo apt install libfuse2 -y
```
#### **2. Grant execution permissions**
Once downloaded, grant execution permissions to the file:
```shellscript
chmod +x *.AppImage
```
#### **3. Move it `/usr/local/bin/`to use it globally**
To be able to run **qFlipper** from any terminal without having to move to its directory, move it to **`/usr/local/bin/`**:
```shellscript
sudo mv qFlipper-x86_64-1.3.3.AppImage /usr/local/bin/qflipper
```
You can now open it with the following command from any terminal:
```shellscript
sudo qflipper
```
#### **4. Create a shortcut in the applications menu (Optional)**
If you want to add **qFlipper** to the applications menu in Kali Linux, create a file `.desktop`:
```shellscript
sudo nano /usr/share/applications/qflipper.desktop
```
Add the following:
```shellscript
[Desktop Entry]
Name=qFlipper
Exec=/usr/local/bin/qflipper
Icon=qflipper
Type=Application
Categories=Utility;
Terminal=false
```
Save the file with `CTRL + X`, then `Y`and `ENTER`.
To update the menu:
```shellscript
update-desktop-database ~/.local/share/applications
```
[^1]: